When it comes to respraying your car, the quality of your paint job relies on the preparation work that you put in beforehand. Whether you are repairing a chip on your rear side door or are respraying the entire vehicle a completely different colour, skipping the proper prep will land you in hot water. Preparing your car correctly is just as important as applying the paintwork itself and so to help you prep your car like a pro, we’ve compiled this handy new paint job guide.
Stripping the old paint
Painting directly on top of your old paintwork is an obvious no-go and so the first thing you need to do is to strip away the old layers of paint to reveal the base beneath. There are several ways that you can remove paint from a vehicle, and we’ve outlined three of them below.
Use a chemical paint stripper
Chemical stripping is often the preferred method for galvanized cars as it helps to keep the zinc coating on the metal intact. Although a messy method, some car enthusiasts prefer chemical stripping because it is a far less dusty process than sandblasting and is less labour intensive than manual sanding. For those looking to strip their cars at home in a residential area, chemical strippers are also much less intrusive as the process is not noisy and so you won’t get under the skin of your neighbours. Here’s how to use a chemical paint stripper to remove the paint on your car.
- Prepare your work area
The first thing that you need to do before starting a new paint job is the chemical stripping process. You must first prepare your work area. Make sure that you are working in a well-ventilated area as the stripper will release some nasty fumes and you may also want to lay down a sheet to catch any run-off and paint scrapings.
- Remove trimmings and extras
For best results and to prevent damage to your trimming, remove all accent pieces of your vehicle prior to applying the stripper. If you can’t or don’t want to remove something, then be sure to cover it well, as the paint stripper will damage virtually everything it comes into contact with.
- Apply the chemical stripper
With your car prepped it’s time to apply your chemical stripper. Use a paintbrush or a spray applicator to apply the stripper to the body of the car, being careful to avoid too much run-off. Be wary of getting stripper in any seams as it can leak out later and damage your new paintwork.
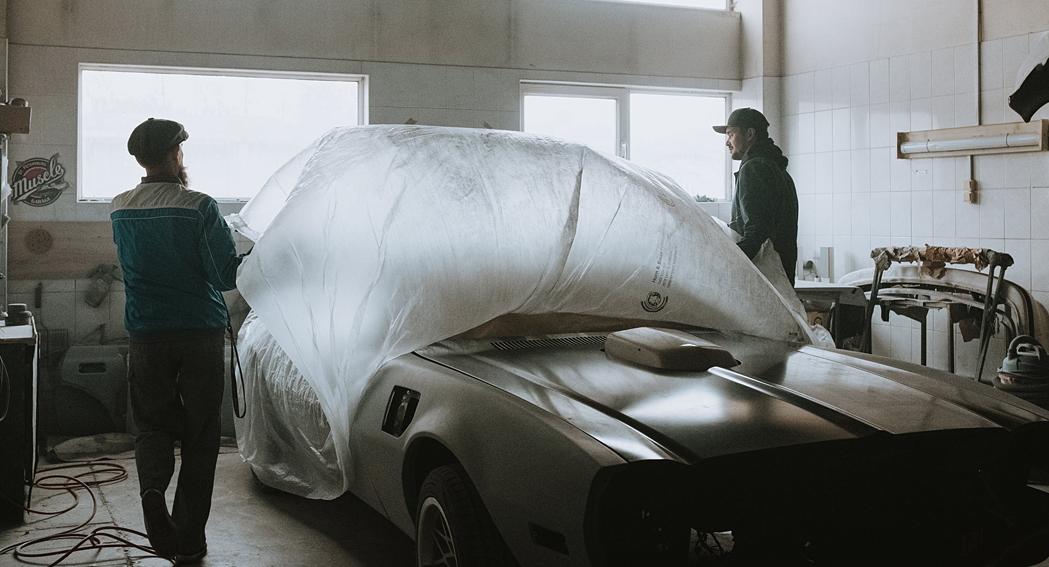
- Cover your car in plastic wrap
To help the stripper do its job and to reduce the number of coats you may need, wrap your car in opened trash bags or plastic wrap. This extra step will also help to keep the fumes under control.
- Wait then scrape
Wait for as long as is instructed by the chemical stripper and then remove your plastic wrap and begin scraping off the loosened paint with a plastic putty knife or similar non-metal tool. Never use a metal scraper on your vehicle as this could damage the metalwork beneath.
- Reapply and repeat
Depending on the thickness of the paint that you are trying to remove, you may need to apply two or even three coats of the stripper to achieve your desired results.
- Clean and dry your car
To remove any excess stripper, rinse your vehicle with cold water and dry with towels. Be aware that some strippers will require a neutralizer to be applied at this stage.
- Remove any remaining spots
To remove any rust spots or stubborn remaining paint, use a wire wheel and gently run it over the body of the car.
- Sand your car
And finally, sand your car using coarse grit and then fine-grit sandpaper to prepare your car for its new paint job.
Using a sandblaster
Sandblasting is a type of media abrasion and is a very efficient way to remove even the most stubborn paint jobs. Whether you are sandblasting your car or boat, it’s important to realise that media abrasion can be dangerous, so if you are unsure of what to do, then it’s usually best to leave it to the professionals. That being said, if you have the necessary equipment then we all have to start somewhere, so here’s what you need to do.
- Prepare your work area
Sandblasting is dusty and messy work, so you will need to make sure that you wear appropriate safety gear including a mask and eye protection and lay down a sheet to help you with the cleanup process later.
- Cover any areas that you don’t want to be blasted
Sandblasting doesn’t discriminate between glass, trimmings and paint, so be sure to cover anything that you don’t want to be scratched or damaged by the sandblasting process.
- Prepare your sandblaster
Next, prepare your sandblaster by connecting it to your compressor and filling it with your silica sand.
- Aim and fire
When you’re ready to go, simply point the sandblaster at the area you wish to strip and move it slowly across the painted surface. Sandblasting is a lot more efficient than manual sanding but still takes several hours to perform correctly. - Clean up any remaining sand
Once all of the paint has been removed, you will be left with a very sandy and dusty work area and the cleanup can begin. Having removed the vast majority of excess sand from around your car, use the compressor to blow any remaining sand particles out of seams or crevices and then wash your car to make sure that no dust remains.
Sand by hand
Manual sanding can be done using sandpaper or an orbital sander and although extremely labour intensive and time-consuming is a very efficient way to remove paint, especially if you need a little more control over the process. Sanding by hand is pretty self-explanatory;
- Prepare your work area
Just like the other methods of paint removal, you will want to prepare your work area to help you clean up later.
- Use a 220 disk to sand your car
Using coarse grit sandpaper first will help you to remove the majority of the paint more quickly. You’ll need several disks to sand a whole car so be sure to have plenty of them spare and to change them when they wear out.
- Sand hard to reach areas
A power drill equipped with a wire wheel will be able to reach hard to reach places that your orbital sander can’t get too.
- Use a 400 grit sanding disk to get the body smooth
Finally, to prepare the body for paintwork, switch to finer grit sandpaper such as a 400 grit and run over the body to even out any deeper scratches.
Priming the body
Having removed the paint from your vehicle, you can then move onto the next stage of preparation which is priming. Priming seals the surface of the metal, providing an ideal surface for the paint to stick to and a protective barrier. If you weren’t able to get the surface smooth enough using a sander, then a high solid primer can also help to smooth any imperfections before the paintwork is applied.
Tips for applying primer
- Always use a metal-specific primer. (If you’re painting plastic, then you’ll need a plastic primer.)
- Aim for at least two coats for a new paint job to ensure that all of the bare metal is covered.
- Try to prime when it is dry and mild as these are ideal priming conditions.
- Cover all areas that you aren’t painting and tape down the edges with masking tape.
- Once the primer has dried, it is easier to see any imperfections. Pause and use this time to decide if you need to touch up any areas before committing further.
- If you need to re-sand an area, then sand off the primer and do what you have to do. You can then re-apply the primer and reassess.
Choosing your paint
Finally, once you are happy with your primer, it’s time to move onto the paintwork. There are thousands of different types and colours of car paints out there, so take your time choosing the right one. If you are trying to colour match a repair, then make use of a colour match tool that will help you to find a shade that blends in seamlessly. When you are ready to paint, if you have done your prep-work correctly, then your paint should glide on in a nice even layer, leaving you with a flawless finish.
Cutting
Lastly, if you are trying to blend new paint in with old, then you may want to add in an additional step called cutting. Cutting removes very thin layers of paint using an abrasive compound which, when applied to a repair, can help the new and old paint to blend together into one cohesive panel.
So there you have it – a quick guide to preparing your car for a new paint job. Have you ever repainted your car yourself? Or would you rather just leave it to the professionals? Let us know your preference in the comments.